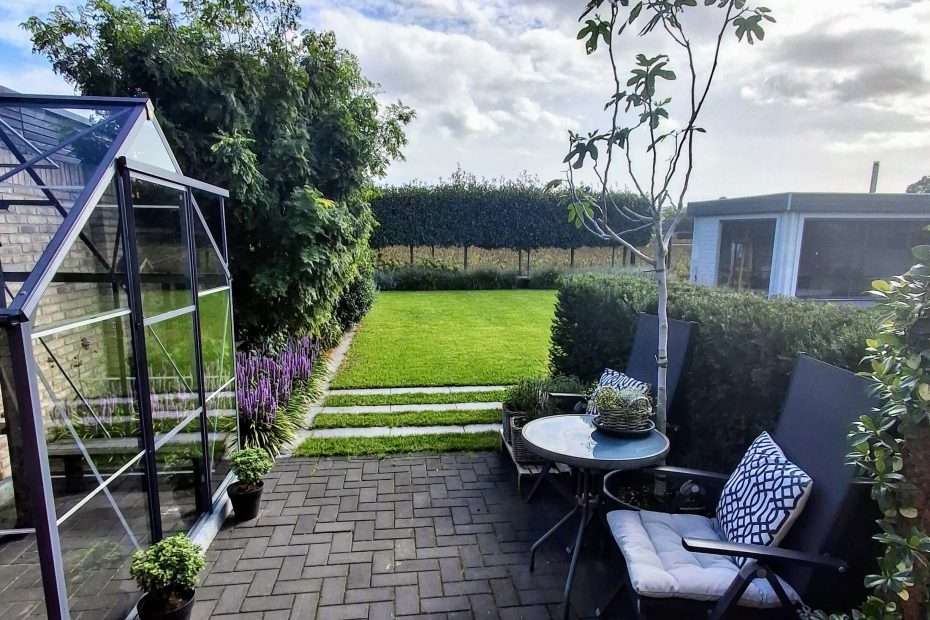
It has been just over a year since we moved to our new home in the countryside, and we are absolutely loving it here! One of my biggest dreams was to grow our own herbs, and select fruits and vegetables. I do not want it big, just good enough to manage with the rest of the garden. Although we have almost an acre of land, it is all beautifully architecturally designed with existing borders and plantings. It was time to get creative!

Pivoting the “Pesticide Plan”
Initially, I eyed a 2×8 meter plot at the back of our garden house for raised vegetable beds. I visualised the kitchen garden with a pathway on the side and arched trellis roofing for climbing Blackberries and Clematis. It seemed perfect—until we realised just how close it sits to the neighbouring commercial farming fields. Last year they grew maize; this year, it’s potatoes. Potatoes are sprayed multiple times throughout the growing season. We read up that the chemicals used are modern, environmentally friendly, and completely safe for people, pets, wildlife, and surrounding plants. Even so, we remain wary about the frequent use of synthetic pesticides and sprout inhibitors. We were completely surprised to see the tractor back on the field every few weeks.
Our neighbours just shrug their shoulders—chalking it up to that casual countryside mentality—but we simply aren’t comfortable taking the risk. Consequently, we made the firm decision to completely scrap that spot for edible gardening. I felt heartbroken; it was a setback that took me weeks to get over.
The Gardenmeister Challenge: A 3-Month DIY Adventure


With our first choice out, our only remaining option was the stone-paved area behind the garage. This meant working with small raised beds and a compact greenhouse. Early this summer, we bought the Gardenmeister Foreststar 100 (200 x 133 x 198 cm). It fits like a glove against our stone wall and leaves just enough side space for my blackberries and blueberries.
It arrived as a flat-pack “build-your-own” package. “It’s small, it’ll take a weekend or two max,” we thought. Oh boy, were we wrong! It turned into a three-month nightmare. While the instructions didn’t explicitly say so, we quickly learned the hard way that you need at least three people to assemble this thing—and there are only two of us!
To make matters worse, the DIY manual was a generic guide for all Gardenmeister models. The Foreststar 100 has a somewhat unique layout, forcing us to improvise at every single hurdle. We ended up assembling the main wall structures inside the garage first, then carefully moving them out to the paved spot. For the foundation, we chose thick recycled plastic. It won’t rot like wood or rust like steel, and it gives the greenhouse a nice little height boost!
Spring To-Do List: The Greenhouse & Fruits
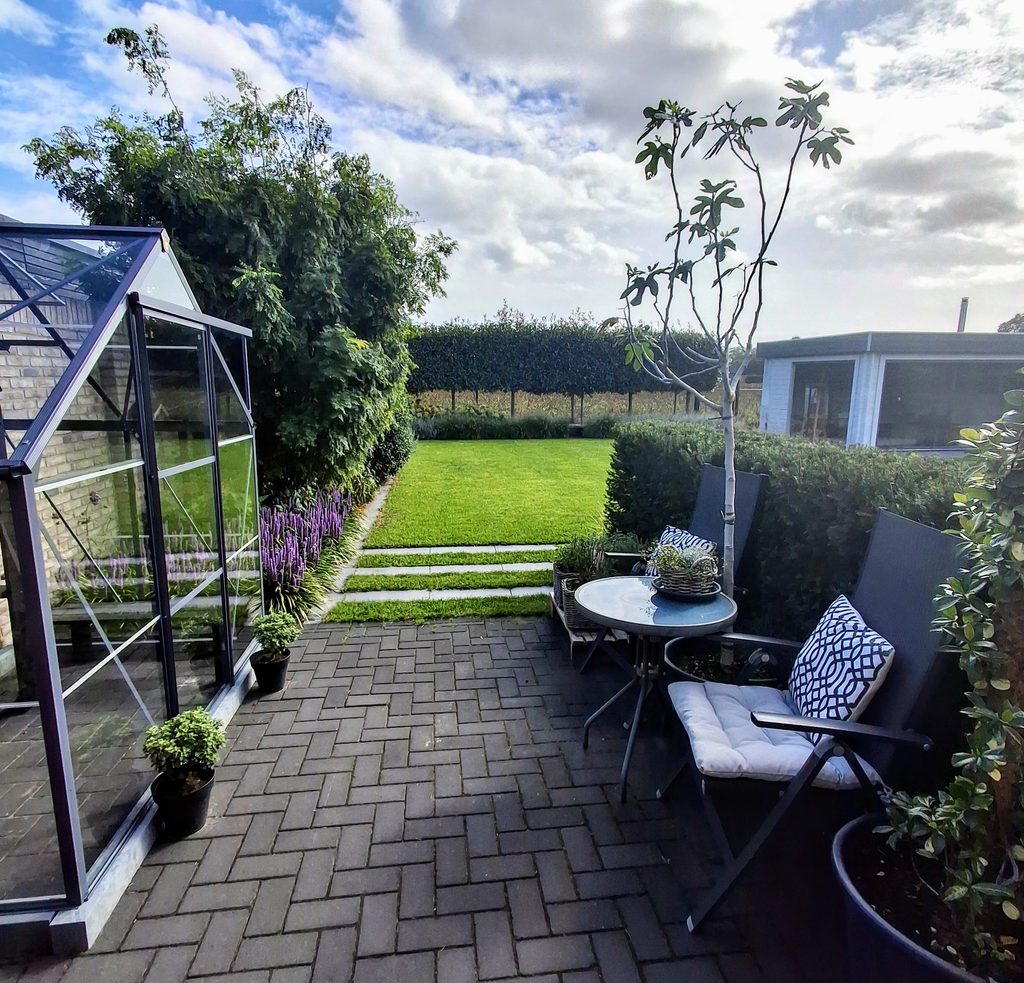


Since the growing season is winding down, I am holding off on building the raised beds until spring. Here is the master plan for the layout:
- Inside the greenhouse: Two approximately 40cm x 120cm raised beds will flank the sides, with shelving in the middle for seedlings. The top tier will be dedicated to strawberries.
- Greenhouse crops: I am definitely planting tomatoes, peppers, and bush beans—things that won’t outgrow the compact space.
- Berries & Vines: The blackberry (Rubus Black Satin) is already growing nicely against the back wall. Come spring, I’ll install a large 2m x 3m trellis for it to climb. As for the ‘Bluecrop’ blueberry I bought last spring, I’m adding a ‘Duke’ variety next year so it won’t be lonely and can cross-pollinate. I have already enjoyed a little harvest from the Bluecrop last summer!
- The Fig Tree: My one-year-old potted fig tree produced fruit this year, but they kept dropping off before ripening. Next spring, I’m planting it directly into the ground in the border right behind our Taxus hedging. I’m really hoping that putting it in the ground will finally give it the stability it needs to thrive, and it will look beautiful there!
- One or two more raised beds: These will be outside the greenhouse and they will be elevated, with the lower part as space for potted flowers acting as pollinators.
A Fragrant Jasmine Umbrella & More Edibles


For our kitchen garden seating area, we set up a small table and two chairs. This spot faces south and gets incredibly hot in the afternoon. Instead of a standard patio umbrella, I’ve come up with a much prettier idea: a Jasmine Umbrella! My star jasmine is currently growing in a big pot, climbing up a support. Next year, I’ll shape the canopy into a natural, living parasol. Beautiful shade that smells absolutely divine in the summer!
To frame this cosy spot, I’m brainstorming one or two more raised beds perhaps 80cm x 80cm to flank the seating area. I plan to fill these with even more delicious edible greens—though I’m still winter-shopping ideas for exactly what varieties they will be!
For now, the kitchen garden is going into autumn-winter hibernation. I might experiment with a few winter greens (so far, the harvested watercress has been a delicious food topping!), but the heavy lifting is done. I am incredibly grateful to “the Dutchman”—I could never have conquered that greenhouse assembly without him!
Stay tuned for future spring updates!
Check out my home garden update last June: The Homestead: The Garden in June
Happy Pottering!
With love from Jo